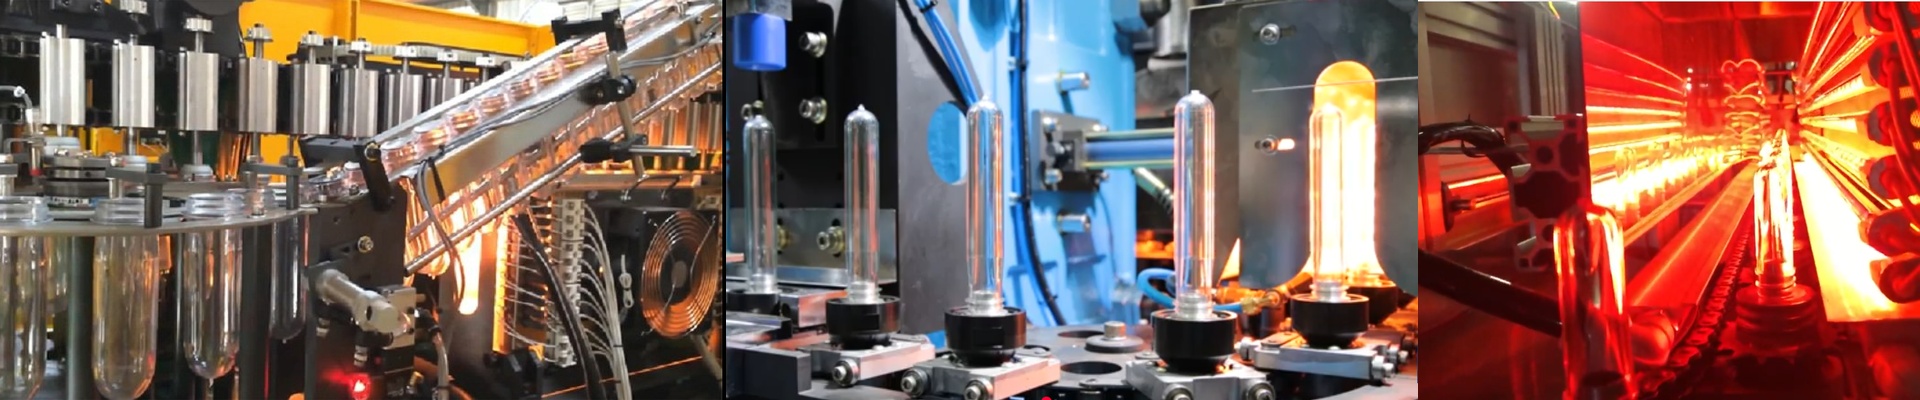
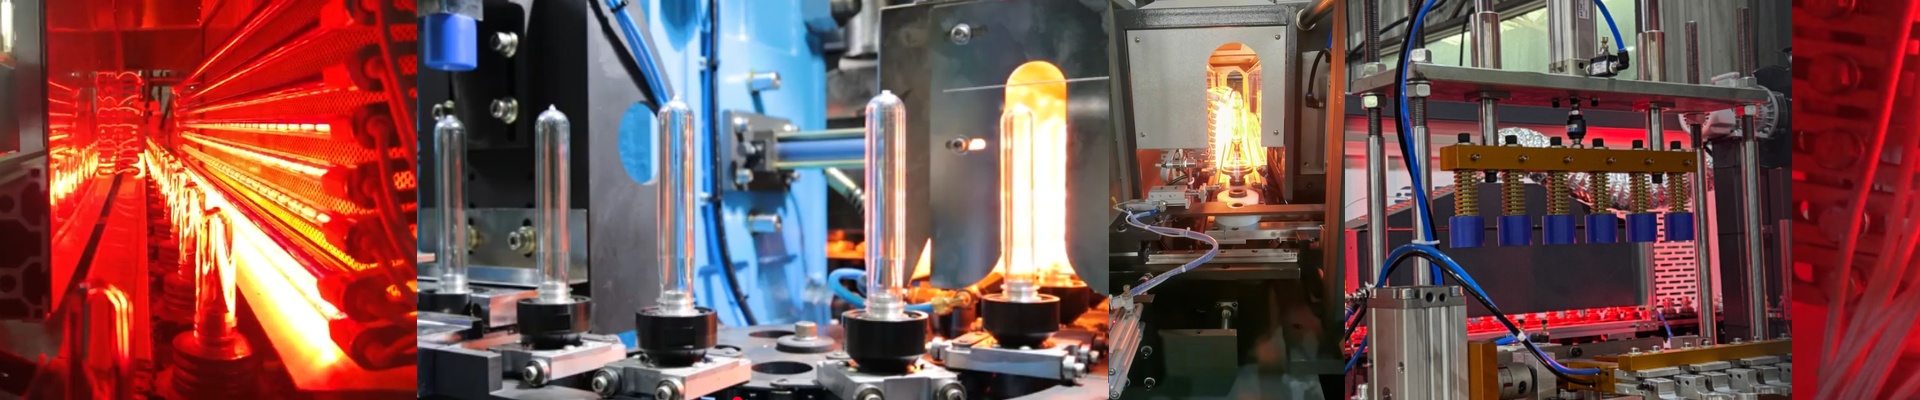
The heating tunnel is the heartbeat of any PET blow molder. If the oven lamp output drifts, the preform wall temperature drifts with it. That doesn’t just mean scrap—it means lost cycles, changeovers that jam, and a line that stops trusting its own settings. In stretch blow molding, consistent heating isn’t optional. It’s the difference between a bottle that runs clean and one that splits at the shoulder. We supply oven lamps and cooling ducts built to match the geometry and thermal behavior your blow molder expects. Whether you’re running Sidel, Krones, SIPA, Husky, SACMI, or Nissei ASB, the target is the same: stable preform heating, repeatable setpoints, and fewer emergency calls.
What actually matters, technically
Infrared heating performance comes down to three things: the emitter, the duct, and the interface.
- **Emitter choice and wavelength.**Halogen and quartz short-wave emitters are standard in blow molding ovens because they respond fast and deliver high power density. We match filament design and quartz tube diameter to the OEM lamp so the heating curve behaves the way your machine’s PID expects. For many machines, we supply lamps in standard voltages (often 100–240 V, depending on the model) and power ratings aligned with the original heating zone design.
- **Cooling duct function.**The cooling duct isn’t just a hose. It’s part of the thermal balance—pulling heat away from sensitive components and keeping airflow consistent across the preform path. We build ducts with the correct inner diameter, airflow direction, and mounting geometry to preserve the original airflow profile. Material is chosen for heat resistance and long flex life, because these parts live in a brutal thermal environment.
- **Hardware interface.**A lamp is only as good as its connections. We provide parts with the right base type and wiring configuration used in blow molder ovens, including common lamp holders and connector arrangements. If your machine uses a specific termination—standard lamp socket or proprietary plug—we match it so installation stays straightforward and the circuit stays stable under vibration.
- **Dimensional accuracy.**Clearance in the heating tunnel is tight. Length, outer diameter, and mounting spacing have to be within tolerance so the lamp sits where it should and the duct routes without kinking. We hold critical dimensions to the OEM envelope so you don’t fight fitment during changeover.
Why this works on the line
On the blow molding line, your oven lamp and cooling duct are doing two jobs at once: heating the preform and protecting the machine. When lamp output is stable, preform temperature is stable. That means fewer swings from cavity to cavity, and fewer rejects from inconsistent stretch behavior. You see it as less trim, less leakage, and fewer line stoppages. When the cooling duct does its job, heat stays where it belongs—away from bearings, sensors, and electrical enclosures. That reduces thermal drift and helps the machine hold dimensional repeatability, shift after shift. These parts also matter for uptime. A lamp that underperforms can force you to back off speed to avoid defects. A duct that restricts airflow can push the oven into alarms. Swap in parts that meet the original thermal and mechanical intent, and you get two practical wins:
- **Predictable scheduling.**You can plan replacements instead of reacting to failures, because the parts behave like the OEM baseline.
- **Energy and scrap control.**Stable heating reduces the need to overshoot temperature, which keeps energy use in line and cuts off-spec material. We design the parts to drop into your existing oven and cooling routes without re-engineering the machine. That matters when you’re running multiple SKUs and can’t afford long changeovers.
The details you actually need
Installation is usually quick, but there are shop-floor realities to handle deliberately.
- **Match the spec, not just the shape.**Two lamps can look alike and still perform differently. Confirm voltage, power, base type, and overall length against your machine’s OEM rating plate or your existing part.
- **Handle with care.**Quartz and halogen components are tough, but they’re brittle. Fingerprints and impact can create hot-spot failures. Use a clean, dry glove and avoid twisting the lamp under load.
- **Check airflow direction and routing.**A cooling duct installed backward—or pinched by a misrouted clamp—will change the oven’s thermal balance. Verify clamp positions and make sure the duct isn’t rubbing against moving parts.
- **Expect a short break-in.**Infrared emitters stabilize after initial burn-in. If you’re commissioning a new lamp, give it a brief stabilization window before you lock in critical setpoints.
- **Watch thermal clearance.**These parts live close to hot zones. If your oven has tight clearance, confirm the replacement lamp and duct won’t contact adjacent brackets or reflectors during thermal expansion. We provide the dimensional envelope so you can verify fit before you start the changeover. If you run a blow molder, you don’t need surprises from the heating tunnel. Spec oven lamps and cooling ducts that match the machine’s original thermal design, and you get repeatable heating, consistent cycles, and maintenance you can schedule—not chase.